Category Archives: networking

ddwrt router refusing to forward multicast packets over an OpenVPN tap device joined to a bridge

Trying out the go-chromecast CLI, I was able to see mDNS requests coming to my home network over OpenVPN (a L2 tunnel using a TAP device bridged using br0 on both ends). I could also see responses being generated, but none of them were seen on the other end. The build of dd-wrt I use has no tcpdump, making it hard to observe both ends of the tunnel.

There’s a lot of sources suggesting a bunch of actions:

However, that was all tapping in the dark.

But when someone mentioned ebtables, nat and PREROUTING, this led me to the right path: what if one of the chains in one of the tables was dropping outgoing packets?

# ebtables -t nat -L POSTROUTING
Bridge table: nat

Bridge chain: POSTROUTING, entries: 1, policy: ACCEPT
-o tap1 --pkttype-type multicast -j DROP

Voila. All multicast packets were being dropped on L2.

# ebtables -t nat -D POSTROUTING -o tap1 --pkttype-type multicast -j DROP

This is fine because I happen to control both ends of the tunnel. Because my systems use multicast only for mDNS, I don’t expect traffic to require drops.

On the bridge device (br0 on both ends), I currently have multicast_router set to 2 on both ends; I have multicast_querier set to 1 on both ends; non-ddwrt system has multicast_igmp_version set to 2; and multicast_snooping is set to 1 on both ends. I don’t claim correctness of any of these, nor do I claim them to be optimal. But, getting mDNS traffic through is exactly what I wanted, so I’m happy right now.
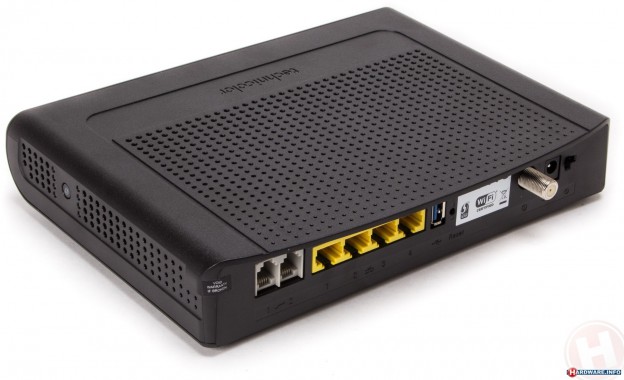
Few notes on UPC/Virgin Media Ireland's Technicolor TC7200

Update 2015/10/03: It’s Virgin Media now? Alrighty then. updates title

Update 2015/01/03: You are probably here for one reason: how to use SNMP to switch this router to bridge mode? As this is unsupported by UPC Ireland, let’s hope they don’t spoil the fun for us. (After posting the main body of the post, I actually got a proper DD-WRT friendly router and have started using this.) So here’s what you’re interested in.

To switch the device into pure modem, non-routing mode, you use:

snmpset -v2c -c public 192.168.100.1 1.3.6.1.4.1.4413.2.2.2.1.7.1.1.0 i 1

Additionally, concerning IPv6, at no later time have I observed receiving an IPv6 globally routable address, so I guess that was a lucky hiccup.


Based on this thread which I ran into here. These are just notes; if you can learn something from them, do so; but please be careful and fully aware that these are not instructions — merely notes for my own personal use in the future. I do not recommend you follow the notes; quite the opposite.

Despite (according to their reps on Twitter) telnet being unsupported by UPC, you can easily telnet 192.168.100.1 and use username: webstar, password: webstar to log into the console. There isn’t much to do there, sadly. Apparently you may be able to use the set command to control SNMP settings.

Some configuration of hidden features can be done via SNMP. I highly advise you not to do that. This is unsupported by UPC, and you might be unable to restore settings to the previous state.

To switch the device into pure modem, non-routing mode, supposedly you use:

snmpset -v2c -c public 192.168.100.1 1.3.6.1.4.1.4413.2.2.2.1.7.1.1.0 i 1

This didn’t work for me immediately. It seems to work immediately after reboot. Also worth noting is the snmpwalk command:

snmpwalk -v2c -c public 192.168.0.1 1.3.6.1.4.1.4413.2.2.2.1.7.1.1.0

Note that the value of “1” means “modem mode” (also known as “bridge mode”), while “2” means “ordinary NAT+routing mode”.

Be very careful. Turning on “modem mode” breaks Wi-Fi. You may need to bring up a separate access point for Wi-Fi. You may have trouble restoring the setting. PUBLISHING OF THESE NOTES DOES NOT CONSTITUTE ENDORSEMENT TO ACTUALLY USE THEM.

Also, I was unable to restore the setting to “2” using SNMP. Hard reset by holding the reset button for 30 seconds worked. Unless you use it strictly as a modem, with another device that performs NAT and IPv6 routing, it isn’t worth switching to NAT mode. So please don’t do this unless you’re fully prepared for breakage of service and possibly annoying UPC (since they obviously don’t want people to play with this).

It’s interesting that UPC does assign a public, fully routable IPv6 /64 prefix. Too bad that it’s not exposed to regular users locked behind a NAT who cannot get direct access to the public Internet, and who have been locked out of it by a firmware that is seemingly arbitrarily restricted compared to the one used in Netherlands. UPDATE: Two sources have told me that they did not receive an IPv6 prefix or address. As I am not keeping my device in bridge mode, and I do not advise readers to do so either (unless they have very good reasons), I cannot and won’t verify this. You can opt to leave a comment on your success, but I want to be clear that neither my text, nor any comments below, represent any advice on my part.

It’s also interesting that the setting seems to have survived a factory reset through the web interface. Factory reset through web interface has, however, restored WiFi functionality, and it seems that WiFi and LAN are getting separate IP addresses. Factory reset by holding the reset button for 30 seconds is the actual hard reset and cleans up the setting for “modem mode”.

Routing IPv6 traffic through Debian pptpd into Hurricane Electric's IPv6 tunnel

This is a repost of an answer I made to my own question on SuperUser (the “non-programmer” Stack Overflow) regarding setting up pptpd under Debian to route IPv6.

In the post, I’m also looking into using this under Mac OS X 10.8 Mountain Lion. I fully understand that PPTP is an insecure protocol and have separately also set up OpenVPN. However, I’m looking at this because PPTP is much more ubiquitous than OpenVPN and it’s easier to set up at both server and client side; no playing with certificate authorities, no playing with distributing configuration files to clients, etc. (Yes, I’m highly annoyed at the OpenVPN client for iOS not supporting the static key setup. Yes, I understand static key is less secure. No, I’m not dealing with stuff that require total and complete anonymity or encryption; I just want a VPN to work.)

This post does not deal with routing the segment through OS X once you got it to OS X.

This post only minimally deals with Windows as a client, because it Just Works™, and does not deal with GNU/Linux as a client, because it didn’t “magically” work under Ubuntu when I tried it, and I am not interested enough to figure out why.

Main goal here is documenting what an OS X user who has access to a Debian server with a public IP needs to do in order to get his OS X machine onto public IPv6 Internet without exposing it to public IPv4 Internet.

Client OS

Mac OS X does not particularly like IPv6 over PPP. Use the following after the connection has been set up:

sudo ipconfig set ppp0 AUTOMATIC-V6
sudo route add -inet6 default -interface ppp0

The prior seems to make OS X adhere to router advertisements; the latter adds a default route for IPv6. (Now, if only the certain-fruity-mobile-operating-system version of route provided -inet6, I’d be a happy wooden boy.)

Also take note that OS X will ignore whatever address was supposed to be negotiated over IPv6 and set up only a local address. This may interfere with routing towards OS X.

On the other hand, Windows 8 (of all systems!) has happily picked up the address sent over PPP, took note of the router advertisement, and overall configured itself flawlessly. PPTP really works nice in Windows.

Server

First thing I missed was that Hurricane Electric’s tunnel broker actually assigns TWO /64 prefixes; one is supposed to be solely for client use, while the other is intended for routing additional clients (such as the PPTP client). And if you need more addresses (or prefixes!), you can even get a /48 prefix. (With IPv6, this means there’s more bits for ‘your’ use; HE’s prefix takes ‘only’ 48 bits. So that provides you a few more bits to control before the auto-generated suffix, created from a MAC address or even created randomly, kicks in and takes over last 64 bits. You could theoretically wiggle and subnet even with only 64-bits to spare, but I’ve seen strange behavior on either Windows 8 or OS X, so I wouldn’t rely too much on that.)

Instead of configuring radvd directly and running it as a server — simply don’t configure it globally. That is, don’t run it as a service on Debian.

Instead, let’s follow Konrad Rosenbaum’s example, at Silmor.de, and have radvd configured after pppd creates the PPP interface.

  1. Set up your IPv6 connectivity. I use Hurricane Electric; I’ve configured it as follows:
    # hurricane electric tunnel
    # based on: http://www.tunnelbroker.net/forums/index.php?topic=1642.0
    auto he-ipv6
    iface he-ipv6 inet6 v4tunnel
        address 2001:470:UUUU:VVVV::2
        netmask 64
        endpoint  216.66.86.114
        ttl 255
        gateway 2001:470:UUUU:VVVV::1
        ## from http://lightyearsoftware.com/2011/02/configure-debian-as-an-ipv6-router/
        # I did not set up the routing of the /64 nor the /48 prefix here, but
        # this would ordinarily do it.  
        #up ip link set mtu 1280 dev he-ipv6
        #up route -6 add 2001:470:WWWW:VVVV::/64 he-ipv6
    
        # Note that Hurricane Electric provides different /64 IPv6 prefixes
        # for the client (UUUU:VVVV) and routing (WWWW:VVVV). 
        # And the /48 prefix is very different altogether.
    
  2. Install pptpd. (Of course, take note of PPTP’s insecurity as a protocol, and consider using OpenVPN or some other alternative.)

  3. Edit /etc/ppp/pptpd-options
    name pptpd
    refuse-pap
    refuse-chap
    refuse-mschap
    require-mschap-v2
    require-mppe-128
    proxyarp
    nodefaultroute
    lock
    nobsdcomp
    ipv6 ::1,::2
    

    Note the last line is different from the text in my question. You’re assigning some static addresses which may be respected by your client OS or not. (OS X seems to ignore them, but Windows uses them.)

  4. Create users for PPTP. Second column filters based on name argument in pptpd-options. Edit /etc/ppp/chap-secrets:
    ivucica pptpd AHyperSecretPasswordInPlainText 10.0.101.2 10.0.101.3 10.0.101.4
    

    You’re supposed to be able to replace the addresses with * instead of listing them manually. I did not try that out.

  5. Assign your PPTP users some IPv6 prefixes. NOTE: this is solely used by the script I’ll list below, which is derived from Konrad’s script.

    Edit /etc/ppp/ipv6-addr:

    ivucica:1234
    littlejohnny:1235
    
  6. Add new file /etc/ipv6-up.d/setupradvd:
    #!/bin/bash
    ADDR=$(grep ^$PEERNAME: /etc/ppp/ipv6-addr |cut -f 2 -d :)
    if test x$ADDR == x ; then
     echo "No IPv6 address found for user $PEERNAME"
     exit 0
    fi
    
    # We'll assign the user a /64 prefix.
    # I'm using a Hurricane Electric-assigned /48 prefix.
    
    # Operating systems seem to expect to be able to assign the 
    # last 64 bits of the address (based on ethernet MAC address
    # or some other identifier). So try to obtain a /48 prefix.
    
    # If you only have a /64 bit prefix, you can try to assign a
    # /80 prefix to your remote users. It works, but I'm only now
    # trying to enable these users to have routing.
    
    USERPREFIX=2001:470:XXXX:$ADDR
    USERPREFIXSIZE=64
    USERPREFIXOURADDRESS=1
    USERPREFIXUSERADDRESS=2
    
    # Add the address for your side of the tunnel to the PPP device.
    ifconfig $IFNAME add $USERPREFIX::$USERPREFIXOURADDRESS/$USERPREFIXSIZE
    
    # establish new route
    # (when a packet is directed toward user subnet, send it to user ip)
    route -6 add $USERPREFIX::/$USERPREFIXSIZE gw $USERPREFIX::$USERPREFIXUSERADDRESS
    
    #generate radvd config
    RAP=/etc/ppp/ipv6-radvd/$IFNAME
    RA=$RAP.conf
    echo interface $IFNAME >$RA
    echo '{ AdvSendAdvert on; MinRtrAdvInterval 5; MaxRtrAdvInterval 100;' >>$RA
    echo ' prefix' $USERPREFIX::/$USERPREFIXSIZE '{};' >>$RA
    
    # Instead of your DNS...
    #echo ' RDNSS $USERPREFIX::$USERPREFIXOURADDRESS {}; };' >>$RA
    # ...try assigning the Google DNS :)
    echo ' RDNSS 2001:4860:4860::8888 {}; }; ' >> $RA
    
    # The creation of radvd configuration could be more readable, but whatever.
    
    # Start radvd
    /usr/sbin/radvd -C $RA -p $RAP.pid
    
    exit 0
    

    Don’t forget to chmod the script to make it executable by pppd:

    chmod 755 /etc/ipv6-up.d/setupradvd
    
  7. The script spews radvd configuration into /etc/ppp/ipv6-radvd/… ensure that the folder exists!
    mkdir /etc/ppp/ipv6-radvd
    
  8. Also add /etc/ppp/ipv6-down.d/setupradvd (and make it executable!) — taken verbatim from Konrad:
    #!/bin/bash
    RAP=/etc/ppp/ipv6-radvd/$IFNAME
    kill `cat $RAP.pid` || true
    rm -f $RAP.*
    

    And

    chmod 755 /etc/ppp/ipv6-down.d/setupradvd
    

I have not tested using DHCPv6 to distribute the routing information, addresses or DNS information, especially since rtadv should be fulfilling these roles. It also would not help me, because as of Mountain Lion, OS X still does not ship with a DHCPv6 client (perhaps intentionally; nine out of ten dentists most of IPv6 experts agree that DHCP is evil).

Once again, please note Michael’s comments on PPTP security; consider using OpenVPN in production.

Yes, Konrad Rosenbaum also has a nice tutorial on IPv6 over OpenVPN. 🙂